Creating a workspace
Both creation paths — the three-step walkthrough and Start from a repository — every field, what is written in what order, and what happens if it fails midway.
There are two ways to create a workspace. Both live under the organization, and both need workspace.create — owner or organization admin.
If you do not hold it, the page is replaced by a callout:
You cannot create workspaces here. Creating a workspace in {organization} needs an owner, admin or lead role. Ask an organization admin.
The walkthrough
Organization → Workspaces → New workspace.
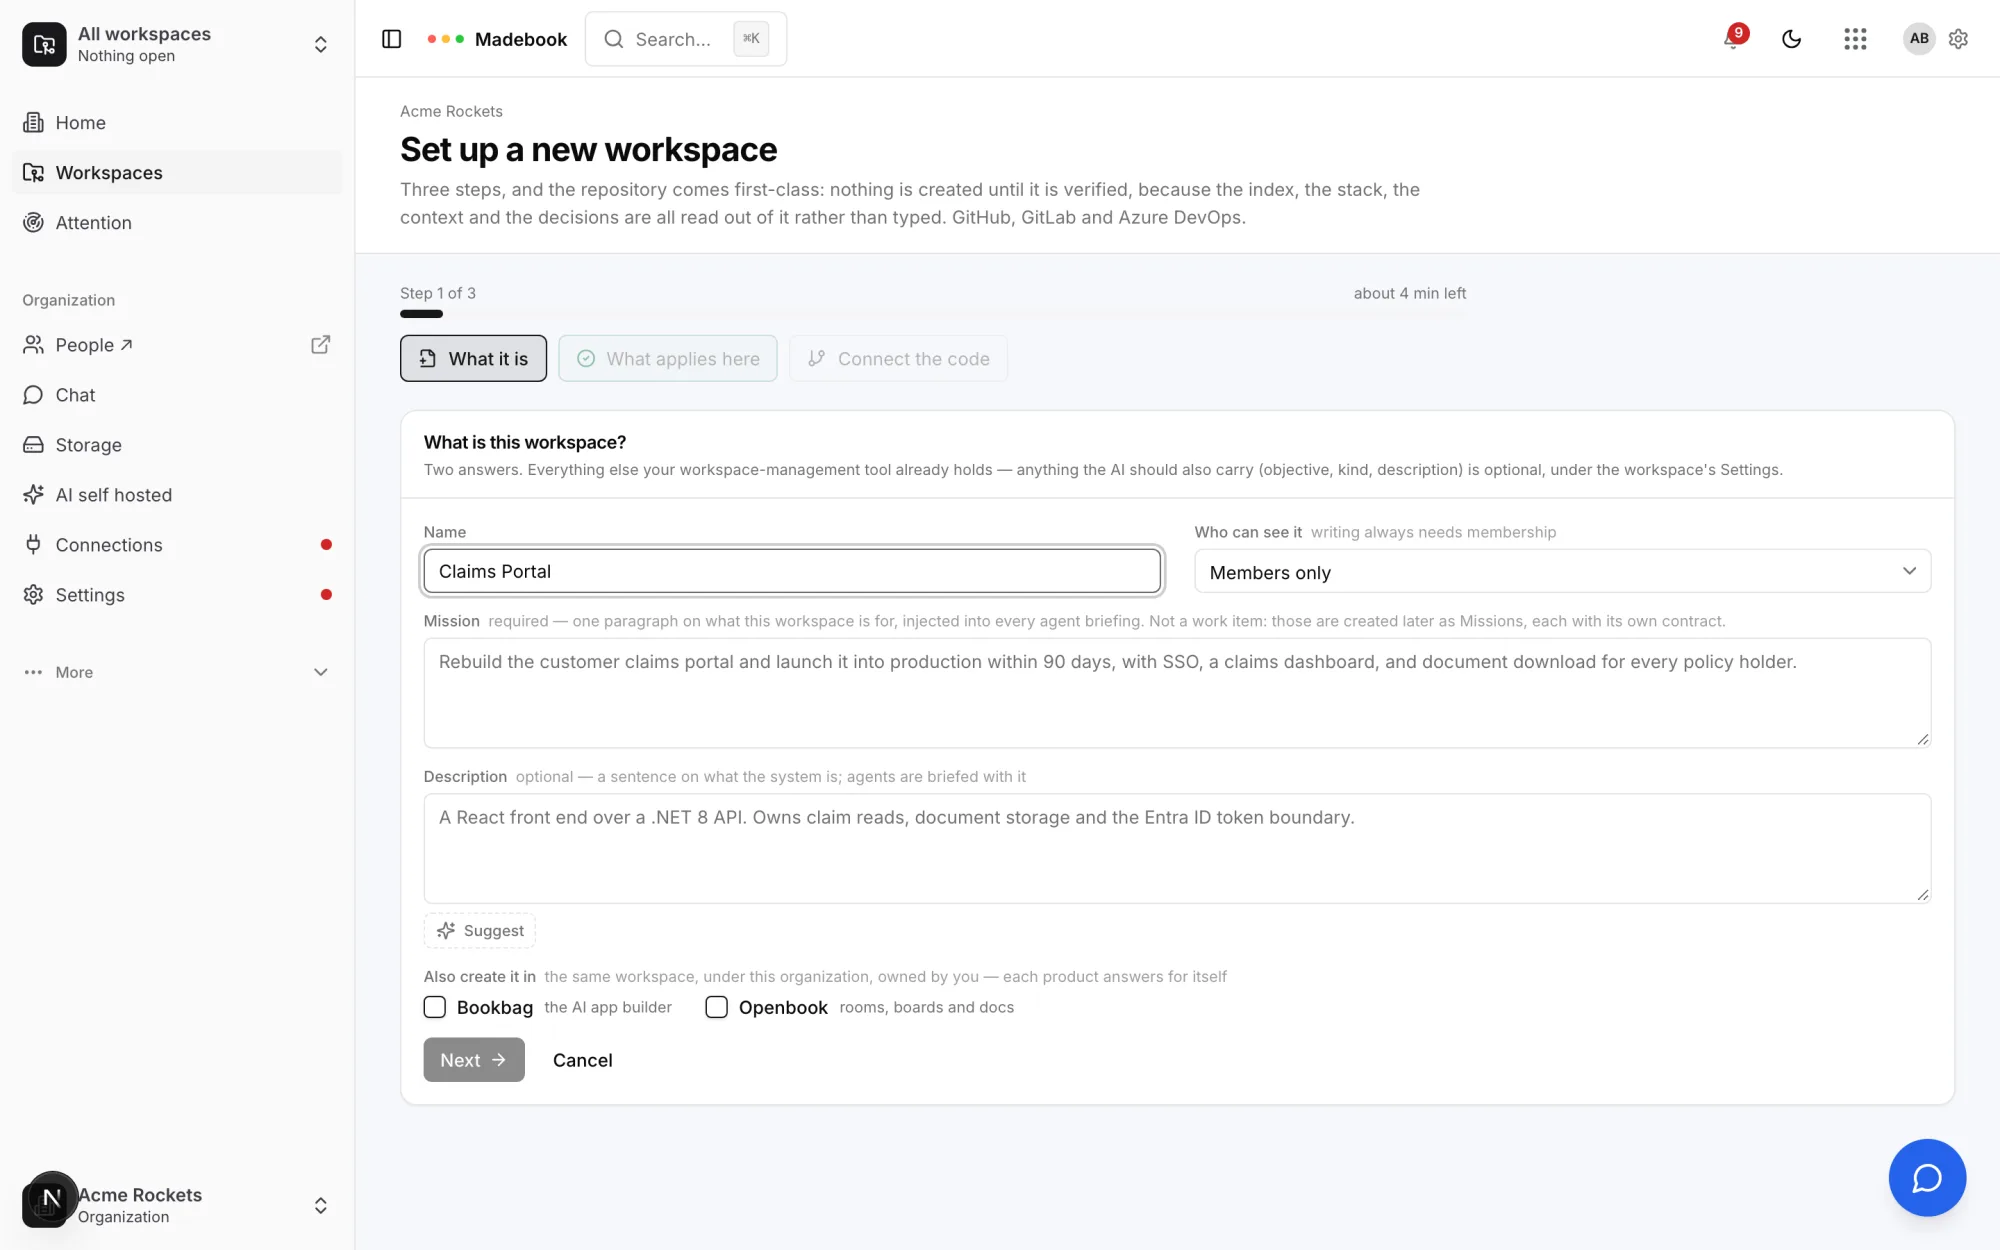
Title: "Set up a new workspace".
Three steps, and the repository comes first-class: nothing is created until it is verified, because the index, the stack, the context and the decisions are all read out of it rather than typed. GitHub, GitLab and Azure DevOps.
The progress bar reads Step {n} of 3 and about four minutes at the start. The three steps are What it is, What applies here, and Connect the code. A step is locked until the ones before it are done.
Nothing is written until you press "Create the workspace." Close the tab at step two and nothing exists.
Step 1 — What is this workspace?
Two answers. Everything else your project-management tool already holds — anything the AI should also carry (objective, kind, description) is optional, under the workspace's Settings.
| Field | Hint | Required | Example |
|---|---|---|---|
| Name | — | Yes | Claims Portal |
| Who can see it | writing always needs membership | No | Members only (default) or Everyone in the organization |
| Mission | one paragraph on what this workspace is for, injected into every agent briefing. Not a work item: those are created later as Missions, each with its own contract. | Yes | "Rebuild the customer claims portal and launch it into production within 90 days, with SSO, a claims dashboard, and document download for every policy holder." |
| Description | a sentence on what the system is; agents are briefed with it | No | "A React front end over a .NET 8 API. Owns claim reads, document storage and the Entra ID token boundary." |
Next is disabled until the name and the mission are both filled: "The name and the mission are needed first."
The description carries a Suggest button that drafts candidates from what Madebook already knows about your organization. See The workspace context.
Also create it in — "the same workspace, under this organization, owned by you — each product answers for itself." One checkbox per sibling product — CodeBook and OpenBook — each with its one-line description. The list, the names and the descriptions come from Bookbag account's app registry, so the field is hidden when no sibling is registered (see Linked products). Tick one and, when the workspace is created here, the same name and description are created under the same organization in that product too, owned by you. The products share people and organizations through Bookbag, so nothing is set up on the other side first. Each sibling answers separately: one that refuses — Openbook's free plan caps the spaces an organization can have, for instance — shows its own message in a toast, and the Madebook workspace is created regardless. The sibling products offer the same checkboxes pointing back at Madebook.
Step 2 — What applies to this workspace?
The organization set up the catalog — its policies and skills. Choose what this workspace takes; everything is changeable later under the workspace's own Policies and Skills pages.
Three blocks, each of which only appears when there is something to show.
The organization's policies — "all apply by default — untick one only if it genuinely does not fit this codebase." One checkbox per active organization policy, ticked. Each shows a severity dot: red for critical, amber for high, blue for medium, grey for low.
Skills — "your organization's own apply by default; Madebook's shelf is opt-in." Your organization's published skills are ticked; platform skills are not. Each carries a badge reading Madebook or yours.
How does this team work? — "pick the standards that are really your rules — each becomes something a reviewer can hold a diff against." A list of standard templates, nothing pre-selected. Each shows a title, a detail, and a badge reading must, should or may.
The footer counts what you picked, or says: "No standards picked — fine to skip; add them any time under Context."
This step is always considered complete — the defaults are a real answer.
Step 3 — Connect the code
Required — the whole setup is read from the repository: the index, the stack, the context, the decisions already made. Verify it, then create.
Three hosts: GitHub, GitLab, Azure DevOps.
| Field | Notes |
|---|---|
| Where the code lives | The host. |
| Personal access token | Required. See the scope guidance below. |
| Owner (GitHub) / Group (or user) (GitLab) / Workspace (Azure DevOps) | Required. |
| Repository name | Required. |
| Organization URL / Self-hosted URL | Required for Azure DevOps. Optional for GitLab. Not shown for GitHub. |
Token guidance, verbatim per host:
- GitHub — "A fine-grained token with Contents: read and Pull requests: read on the repositories this workspace needs. A classic token with
repoalso works." - GitLab — "A token with the read_api and read_repository scopes. Add api only if the supervised-merge status should be posted — that is the one write, and it is a status, not code."
- Azure DevOps — "A token with Code: Read, and Code: Status to post the supervised-merge verdict. The API base is the organization URL and is required."
Verify access does exactly two API calls and keeps nothing:
Nothing is stored by verifying — the token is used for two API calls and dropped.
On success: "Verified — {full_name} is reachable as {account}". Editing any repository field clears the verification.
Create the workspace stays disabled until a verification has succeeded: "Verify the repository first — the whole setup is read from it."
The callout above the button sets expectations honestly:
Creating takes about a minute: the workspace is written, the repository is attached, and a background run indexes the code, reads it into the context and mines the decisions already made. The workspace stays hidden — even across a refresh — until that finishes, then it opens itself.
What is written, in order
- The workspace row, with
setup_state: provisioning, a new public id, and a slug unique within the organization. - Your membership, as workspace owner.
- An empty context record for the workspace.
- An audit event,
workspace.created. - The standards you picked, if any.
- One "off" record per policy you unticked. Only the deviations from the default are written.
- One record per skill whose checkbox you changed from its default.
- The repository is attached, which fetches it from the host — so the default branch and the private flag come from the host, never from what you typed, and the fetch itself proves it is reachable.
- The provisioning run is started.
There is no transaction. Steps 1–4 are what make a workspace exist; everything after is best-effort.
If it fails midway
Each later step reports its own failure and carries on:
| Step | The message |
|---|---|
| Standards | "The workspace was created, but its standards did not save — add them under Context." |
| A policy | "Could not switch off {name} — do it under the workspace's Policies." |
| A skill | "Could not set {name} — adjust it under the workspace's Skills." |
| The repository | "The repository could not be attached — connect it under Repositories." |
| The provisioning run | "The setup run could not start — index the repository by hand under Repositories." |
The last two also flip the workspace out of provisioning, so it is at least openable. If step 1 itself fails, nothing exists.
The provisioning run
While it runs, the entire workspace shell is replaced by a waiting page that polls every four seconds.
Setting up {name} — Give it a minute. Madebook is reading your repository so nobody has to type what it can learn — the index, the stack, the context, the decisions already made. This page opens itself when it is done.
The five phases, with the messages you will see:
| Progress | Message | What it does |
|---|---|---|
| 5% | Indexing the repository… | The full index. This one is load-bearing — if it fails, the run fails. |
| 55% | Reading the repository into the workspace context… | Derives the stack and proposes standards. Failure is caught; the workspace opens without it. |
| 80% | Mining the decisions already in the record… | Failure is caught. |
| 90% | Reading the last few merged pull requests… | Builds review capsules for the last 5 merged pull requests. Failure is caught. |
| 96% | Opening the doors… | Flips the workspace to ready. |
If it hits a wall:
Setting up {name} hit a wall — {the error}. The workspace itself is fine — open it and run the pieces by hand: Re-index under Repositories, Read my repository under Context.
with a button, Open the workspace anyway.
Start from a repository
The 60-second path. A button next to New workspace.
Pick one. Madebook creates the workspace, indexes the code, reads the stack, context and decisions out of it, and builds review capsules for the last five merged pull requests. About a minute.
It lists every repository your existing connections can see, up to 200, with a search box. A repository reached through the GitHub App carries a via the App badge. Press Start on one and it does everything.
If nothing is connected:
Madebook cannot read your code yet. This needs the repository connection — the Madebook GitHub App (one click) or a repository token for GitLab and Azure DevOps. It is not an API token. The quickest way is the walkthrough, which connects the repository while it creates the first workspace; the status and the explanation are on Connections.
The list is what the organization offers: everything its connections can see, or only the repositories chosen on Connections. When repositories are being withheld the page says so and links to change it; when nothing is offered yet it reads "Nothing is offered yet — choose repositories on Connections."
What it names things
- The name is the repository's name made readable:
claims-portalbecomesClaims Portal. - The description is the repository's description.
- The mission is left empty, deliberately. The one paragraph only a person can write is left honestly blank, and the setup checklist says so.
- Kind is
other, statusactive, visibilitymembers.
Then it attaches the repository and starts the same provisioning run.
Finishing setup afterwards
A workspace created without the walkthrough's later steps gets an onboarding page at /workspaces/<id>/onboarding.
The walkthrough's last two steps — mostly Madebook reading your repository. The first three were done when the workspace was created.
Step one is connecting and indexing a repository. Next stays disabled until at least one repository has actually been indexed. Step two reads the repository into the context. Neither step writes to business_context or known_constraints — those two stay yours.
Related
- Workspaces
- Connections — connect GitHub once for the whole organization.
- Connecting a repository
- The workspace context